Have you ever thought about creating a macro in ImageJ?
Using the recorder feature provided in ImageJ, you can easily turn your regular operations into macros.
A macro is a script that automatically executes a series of commands, which is useful for automating specific tasks.
Windows11(22H2), ImageJ 1.54d
What is a recorder?
The recorder function in ImageJ is a tool that logs the operations you perform in the format of a macro.
For instance, when you perform operations such as opening an image, applying filters, or taking measurements, the corresponding macro code for each operation is generated. Thus, even those unfamiliar with writing macros can convert image analysis procedures into macros.
The macros created with the recorder can be executed as they are, or further edited as needed. This is a very convenient feature for enhancing the efficiency of image analysis in ImageJ.
What is a macro?
The macro functionality of ImageJ is a powerful tool for automating image processing tasks by executing scripts written in a macro language. By using macros, you can automate repetitive processes and improve the efficiency of your work. It’s also possible to create custom tools.
On the ImageJ website, there are sample macros available that can be used to easily carry out a variety of image processing tasks. Furthermore, by using the recorder function, you can generate macro codes easily and debug them.
How to use the recorder
Here is a guide on how to use the recorder function in ImageJ
Starting the Recorder
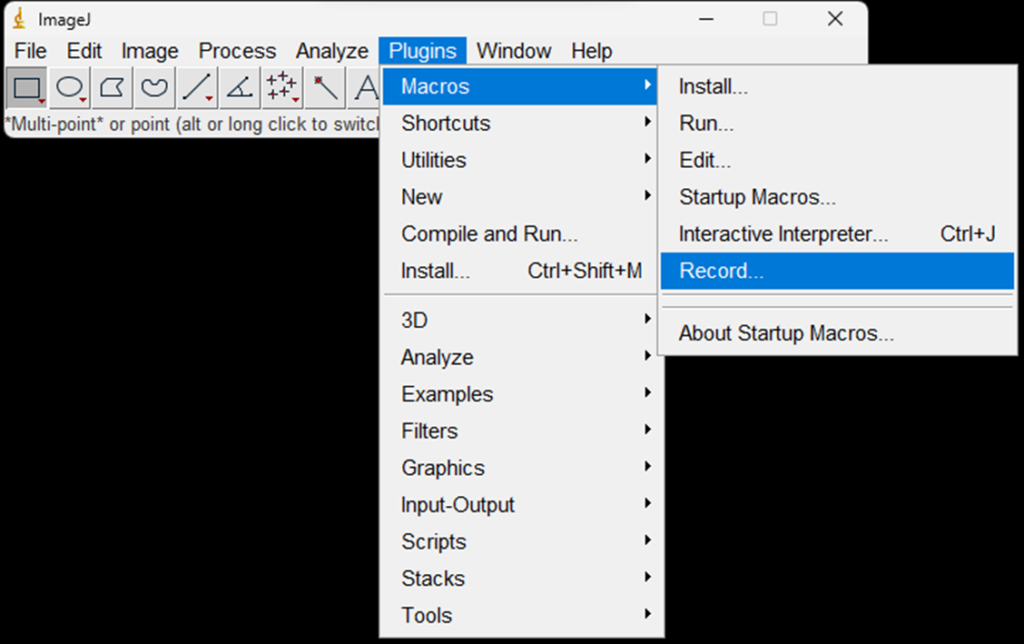
First, launch ImageJ and select Plugins > Macros > Record…
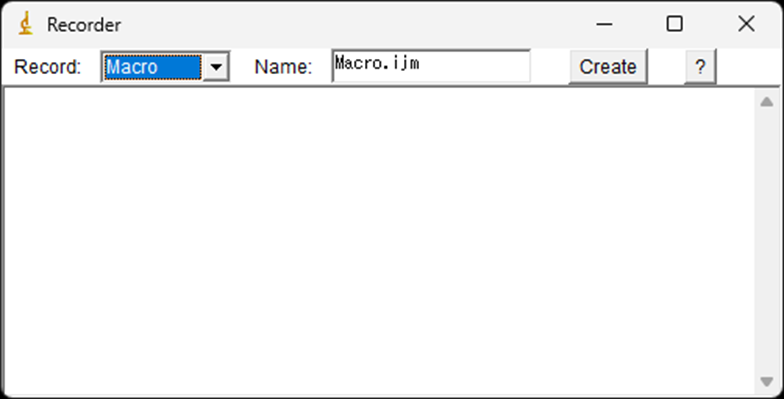
A window like the one below will open. Select “Macro” under “Record:”.
From this point on, any operations performed in ImageJ will be recorded as a macro in the Recorder.
Opening an Image
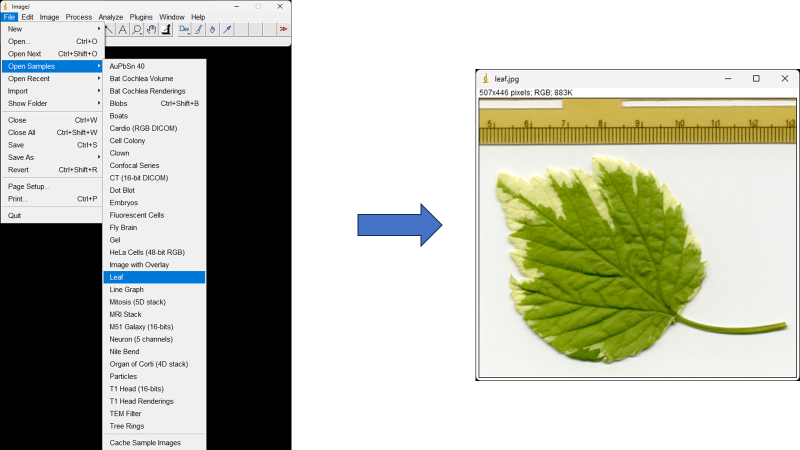
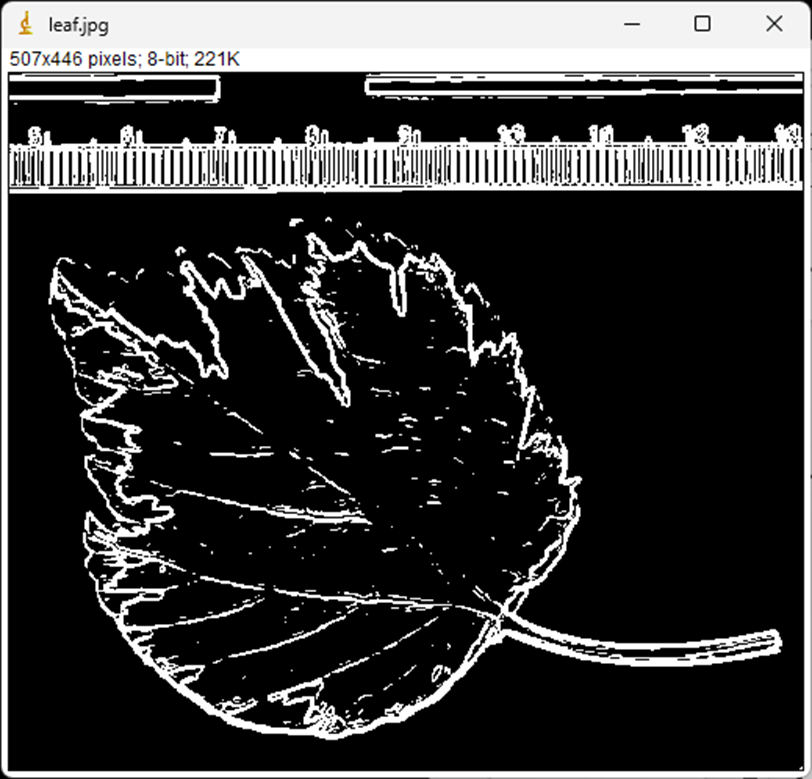
Now, let’s use the sample image “Leaf” and create a macro to extract the leaf boundary using the Recorder feature.
Select File > Open Samples > Leaf to open the leaf image.
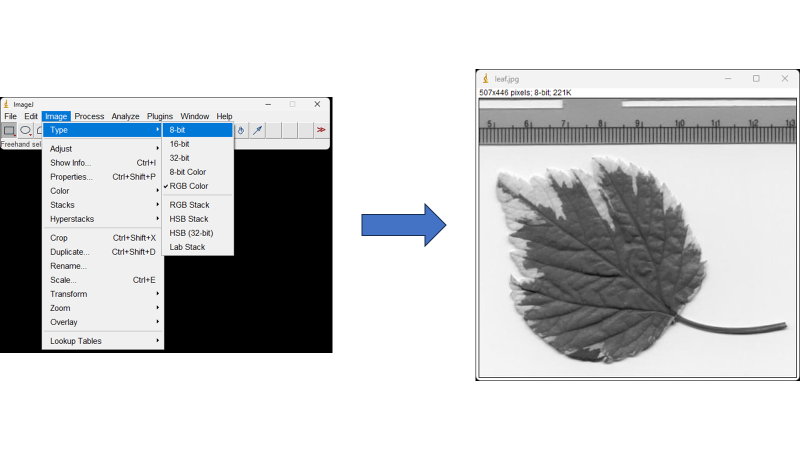
Convert the image to grayscale.
Next, convert the image to grayscale to detect the boundaries.
Select Image > Type > 8-bit from the main menu to convert the opened image to a black and white image.
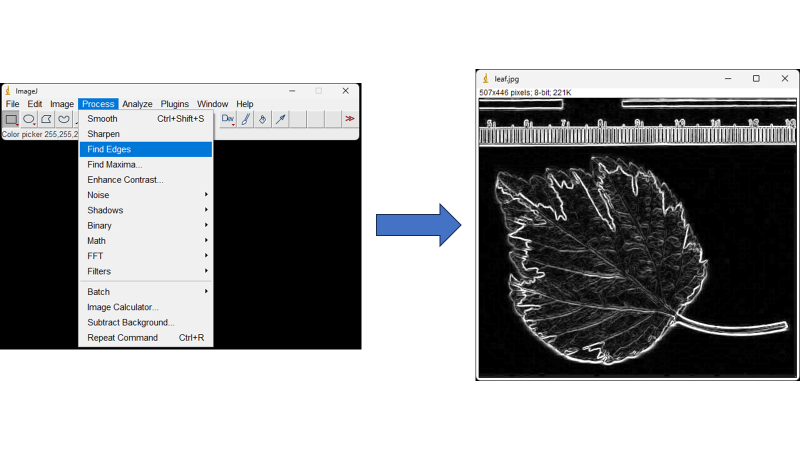
To detect boundaries within the image using the edge filter.
Using the edge filter function, we will emphasize the boundaries within the image.
From the main menu, select Process > Find Edges. The boundaries of the open image will be emphasized and converted to the following image.
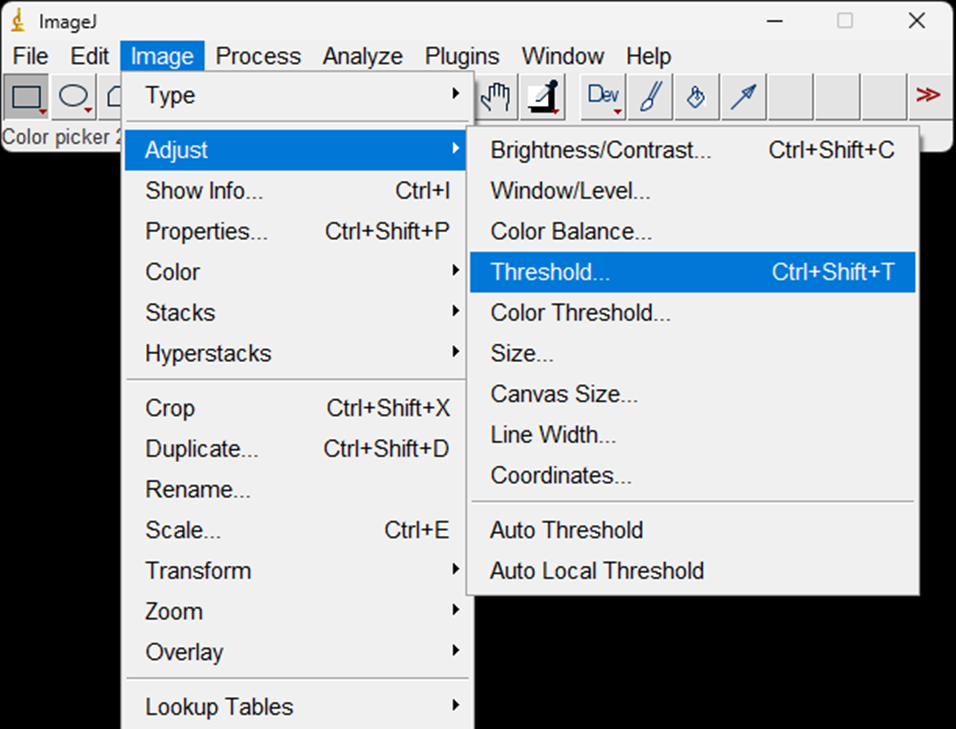
Drawing the boundary lines
Finally, adjust the image threshold so that everything but the boundary lines emphasized by the edge filter becomes the background.
From the main menu, select Image > Adjust > Threshold… When the Threshold window as shown in the image opens, for this instance, let’s just select “Apply”.
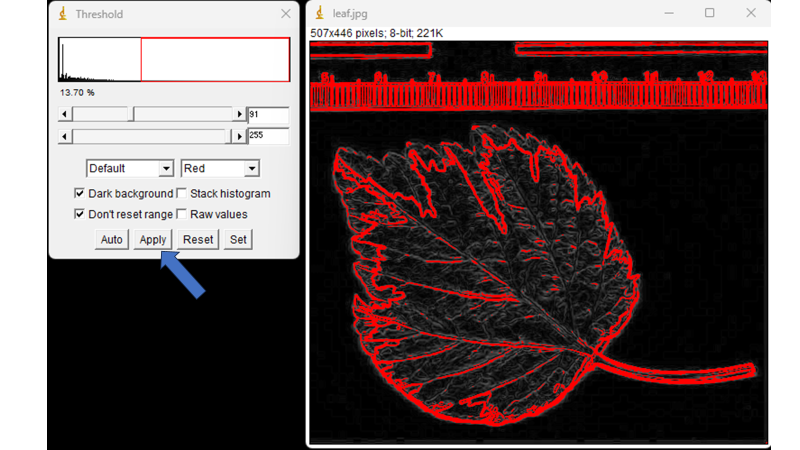
This will adjust the image based on the threshold, modifying it to look like the following image.
To save the macro file:
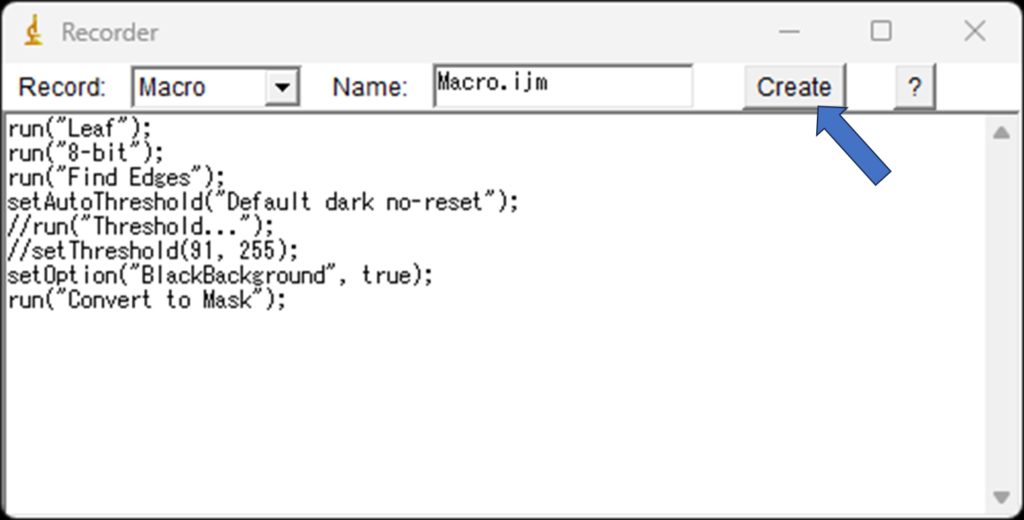
At this point, the recorder window should look something like this, representing the operations we have carried out in macro form. Now, select “Create” in the upper right corner to output the contents of the recorder as a macro file.
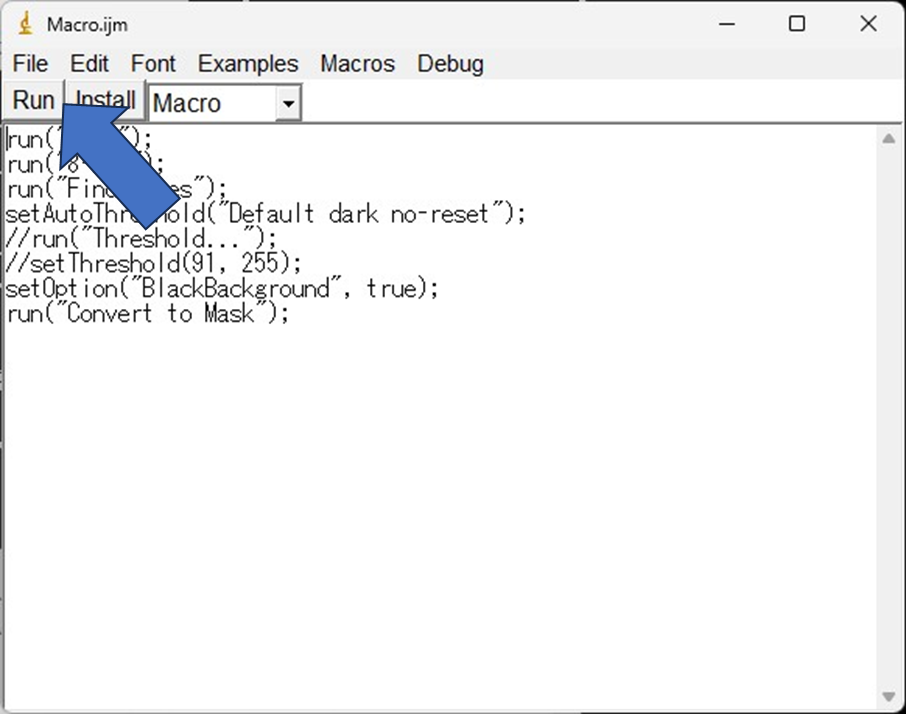
This will open a new window as shown below. If you want to save it as a file, you can save it with your favorite filename from File > Save As….

Let’s execute the macro.
Finally, to verify that the macro we created works as expected, let’s execute it. To do this, click “Run” in the top left corner.
If a new image identical to the leaf boundary image we created earlier is generated, then you have successfully confirmed the operation of the macro file.
In conclusion
In this article, we introduced how to create macros using the recorder feature in ImageJ.
Using the recorder feature, even if you’re not familiar with writing macros, you can easily create macros, reducing the hassle of repeated analyses.
I hope you can utilize this and enhance the efficiency of image analysis with ImageJ.